first of all i created a load of planes along the body of the weasel then shaped the egdes of those planes to match the weasel. then i connected the edges in places where i needed to extrude and add depth. i left a hole so that i could extrude the inner edges and make an arm, then bring out the left side to make the chest. then use the symmetry tool to connect it together. making sure my vertices were on the x axis at 0.025 so that when i activated the auto weld on the symmetry tool @ 0.1 the x axis would merge together to form a complete weasel
with the feet i pulled down some edges and left some polygons on the inside of the foot to make a body and have the feet on the outside.
here is how i modelled the face, extruding the edges outward to match a real weasels face as much as possible.
my finished head, where there are eye bulges i used the chamfer tool early to make eye sockets but instead i extruded them outwards so that i could just roll over a black textured dot when shrink wrapping. didnt work out that way though so i put in 2 spheres and gave them noise maps to give an animal eye looking effect.
here is the underlying texture i used to put the base for the hair and fur modifier
here it is being applied using shrink wrap
then i applied hair and fur modifier and made some grass using a plane and hair and fur modifier then i put in a tree background. used photoshop to get the RGB of the grass and matched it with the grass in the scene. then i trimmed the hair added made it a little thicker for realism.
end result:
fur is incredibly hard to do and in hind sight maybe not the best of ideas but im happy with my efforts.
Tuesday, 8 December 2009
Weasel !!!!!!!!!!!!!
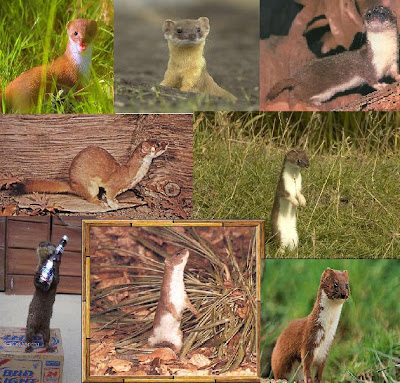
for my third and final stamp i will be doing a weasel. i have chosen a weasel because of the history me and a close group of friends share with the word as it was a joke we played throughout one of the best holidays we've ever had, so i thought why not do it? i will be doing a weasel with a hair and fur modifier and will put it standing up in a natural habitat. Weasels vary in length from twelve to forty-five centimeters long (six to seventeen inches), and usually have a dark brown upper coat but i will be making mine with more of a ginger coat
Monday, 7 December 2009
Shark model
This was the start of my shark
what i did was i got a very basic image of a tiger shark and used it to shape it. i got a plane and extruded it across the shark leaving vertices to push down and make the basic body shape. i then connected the edges using the connect tool to make some lines for depth. Then i pulled those lines out towards view and altered them to give the shark a realistic look.
i then extruded the parts of the shark where they had fins and at the tail and connected the edges to make lines to add depth to the tails. i then added the turbo smooth modifier to give it as much realism as possible.
lastly i used UVW unwrap to texture it. i had to figure out where all the broken pieces went and color it accordingly using photoshop. it looks something like this:
and this is the end result:
with the sand texture i used a box and gave it 60 length and width segments and added a noise modifier to give it a bumpy sea floor look. i then used the basic sand texture that 3ds max has in its standard libraries then i got a light and added a caustic filter which is also in the standard light library of 3ds max.
Preperation for second stamp
the second stamp iam going to is going to contain a tiger shark in an underwater scene. tiger sharks can grow up to 4 meteres and weigh upto 1,400 lb. it eats fish seals birds smaller sharks squids turtles and dolphins. the stripes on a tiger shark fade with age so i'll be doing a rather young tiger shark :)
Sunday, 6 December 2009
spider finished
Subscribe to:
Posts (Atom)